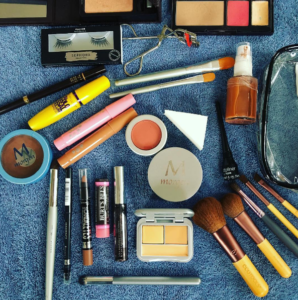
23 May The Perfect Make-Under
 Step 1
Never, ever, ever, (ever!) go to bed with makeup on your face. I don’t care if you are plastered or breast-feeding or sick as a dog – wash your face and put your usual moisturizer or night cream on.
Step 2
Never use cleanser or soap on your face in the morning. Simply wake up, splash cold water on your face, pat dry and while you still have slightly damp skin, add your moisturizer and/or sunscreen.
Step 3
Apply your usual concealer, bb cream or use what we did: L’Oréal Paris Revitalift Miracle Blur Instant Skin Smoother Finishing Cream
Step 4
Apply a stick or cream concealer one shade lighter than your natural skin color. Keep it to the yellow side, so it blends in with your natural coloring. This lightens-up areas on our faces where we have natural “valleys” created by our bone structure or sagging skin. Concentrate under your eyes, the lines from nose to mouth, the “puppet lines” under and outside of your bottom lip, in your temple, next to your browbone. Blend all, but leave the rest of the skin clean.
Step 5
Cover your redness, ruddiness and age spots. With a stick or cream concealer as close to your good skin color as possible, dab a tiny amount (think “dot & blend”!) on your chin, around the nostrils, the bridge of your nose and any age spots or broken capillaries you see. You should see an all over, even-toned skin now, not a heavy mask. We used: L’Oréal Paris True Match Super-Blendable Crayon Concealer
Step 6
Eyebrows open up your face instantly, when picking out an eyebrow pencil go lighter than you think, but match it to the tone of your hair color: if your hair is reddish, go reddish, if you are warm blonde, go warm, ash blonde/brunette, go ash. Brows should begin at the inner corner of your eye (use a pencil to map a straight line up from your tear duct!) and end after the outer corner of the eye.
Pencil your eyebrows in first to see your ideal shape, then simply clean up your brow plucking strays one at a time and take your time – you can’t glue them back on!
To accentuate your natural arch, use a lighter brow pencil and shade the outside curve of your arch to give it lift and add depth. To lengthen the brow, lift your right temple with your left hand and use feathered strokes to extend. This line should run parallel to the slant of your jawline.
Step 7
To make your eyes pop without the heavy or harsh look of too much eyeliner, take your pencil liner and gently jiggle it into the base of your top lashes, like you are separating trees in a forest. We used: Black Violet Kohl Eye Pencil from Laura Mericer
Step 8
For the freshest face, you want your lips and cheeks to look young, alive and rested. If you use too heavy a hand on either, you look over made up, old, and dated. I recommend you stain your lips first, then use blush. For fuller lips without the weight use a lip stain like we did: L’Oréal Paris Colour Caresse Shine Stain by Colour Riche
Step 9
Look in the mirror and smile. Do you really need blush? If so, pick one that is a warm rose, something not too orange or plum, with just a hint of apricot mixed with light pink. This universal color will pop and make almost any complexion look rosy and even-toned. It’s amazing how this works! Here’s what I used: L’Oréal Paris Visible Lift Color Lift Blush
Step 10
And now for your fringe! Do one coat first, make sure it’s not clumpy, then you can add another to the outer corner lashes for some pizazz. Here’s what I used: L’Oréal Paris Telescopic Shocking Extensions Mascara

Juanita Rodriguez Luke
Posted at 12:43h, 11 AprilWill we be able to buy active argan on another home shopping network?